Tap Into Success: How to Choose the Ideal Keg Coupler for Your Needs
There’s nothing quite like pouring a perfectly cool pint of your favourite brew. But before you can savour it, you need the right keg coupler to unlock the keg’s full potential. With countless options available, from D-type to S type coupler, choosing the ideal one feels like navigating a maze of fittings and valves. In this post, I’ll be your trusty beer guide and help you discover the perfect fit for your needs. So, raise your glass, and let’s embark on a journey to pour perfection!
Why Do I Need a Keg Coupler?
You can’t pour beer without a proper connection between the keg and the tap. This is where the magic of a special device comes into play. Keg couplers are essential tools that act as middlemen between the cask and your glass. These tools ensure a smooth flow of liquid, bringing the beer right to your lips in all its bubbly glory.
Without this device, it would be like trying to pour a drink without any control or finesse. You’d end up with a foamy mess or a frustratingly slow pour. But with a coupler, you can tap into that keg with ease, ensuring a steady and perfectly poured glass every time. This device connects to the cask, allowing you to control the flow and maintain just the right amount of pressure. It lets you dispense the beer smoothly, preserving the flavour, carbonation, and overall quality.
Not only does this tool make the process of pouring a beer easier, but it also keeps things sanitary. It acts as a barrier between the keg and the outside world, preventing any contaminants from entering your precious beverage. It protects the integrity of your drink and ensures that each sip is as pure and delightful as it should be.
What Are the Different Types of Keg Couplers?

So, let’s dive into the art of tapping into those kegs! Surprisingly, there are many different types of taps, each specially designed to match specific types of casks and different beer brands. Here are the most popular types that you can find online:
-First, there’s the durable type S keg coupler, also called the European Sankey coupler. They’re crafted from high-quality materials, ensuring a long lifespan and reliable performance. They ensure a seamless connection and smooth pouring experience, whether you’re craving a pint of Guinness or a German wheat beer. The S keg coupler has a distinctive narrow probe and it’s a favourite across Europe and the UK. If you’re a fan of European beers, you’ll typically find this tool attached to those casks, ready to pour you a smooth and creamy pint;
-Next, we have the D tap, also known as the American Sankey tap. This bad boy has a wider probe than the type S keg coupler and it’s commonly used with domestic beers in the United States. It features a sturdy construction and a lever handle for easy operation. You’ll often find this type in casks of popular American brews like Budweiser, Coors, and Miller;
-Moving on, you can use the G-type tap (or the “Grundy” tap) for German beers like Warsteiner and Paulaner. It’s similar in appearance to the S type keg coupler but has a slightly different design to accommodate specific German keg valves;
-The M-type tap is specifically designed for tapping into German breweries such as Schneider Weisse and Franziskaner. It features a sliding mechanism that makes it a breeze to connect and disconnect from the cask;
-Lastly, the KeyKeg tap is unique as it’s designed specifically for the innovative disposable KeyKegs. These taps typically feature a special fitting that allows for safe and efficient dispensing of beer.
Installation
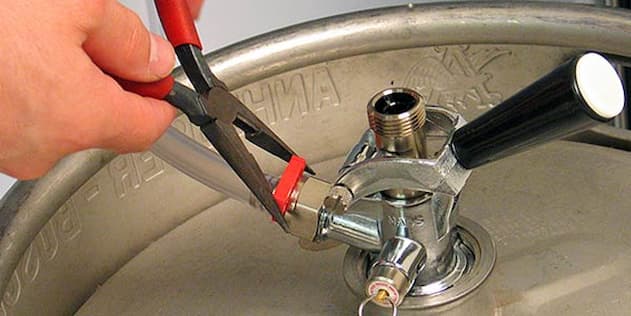
Installing a keg coupler may seem like a daunting task at first, but with a few tips, you can tap into that keg with confidence and ease:
-Make sure you have all the relevant tools and equipment nearby. You’ll need a wrench or spanner, some food-grade lubricant, and, of course, your keg and tap system;
-First, ensure that your cask is cold and ready for you to install a tap onto it. Cold beer is always better, right? Now, locate the round opening on the top i.e. the “valve”;
-Familiarise yourself with the different parts of the coupler. You’ll notice a probe that extends from it and a handle or lever for operation. The specific design may vary depending on the type you have, but the principles remain the same;
-Next, gently insert the probe into the valve opening. Make sure it goes in smoothly and aligns with the notches or slots on the valve. Give it a little twist if needed to ensure a secure fit;
-Once it’s in position – tighten it up! Use your wrench or spanner to tighten the coupler and ensure a snug connection. Be careful not to overtighten, as it can damage the keg;
-Apply a small amount of food-grade keg lubricant to the rubber gasket or O-ring on the device. This will help create a proper seal and prevent any leaks. Remember, a well-lubricated casket is key to a successful pour;
-When you securely attach and lubricate the device, it’s time to engage the handle or lever. This will allow the beer to flow from through the coupler and into your tap system;
-Now, give it a quick check for any signs of leakage. If you spot any, double-check the tightness or adjust the positioning to ensure a proper seal;
-And voila! You’ve successfully installed your keg coupler and are ready to enjoy that cold, refreshing beer. So, sit back, relax, and raise a glass to your newfound tapping skills!
About Author
ben